
Lender Draw Inspections: A Contractor’s Practical Guide
A lender draw inspection is an independent, on-site verification that the work claimed in your draw request has been physically completed before the lender releases funds. Think of it as a quantitative checkpoint, not a quality audit. The inspector confirms what percentage of each budget line item is actually in place, and the lender uses that number to calculate exactly how much to disburse.
Here is why this matters directly to you:
- Inspection results determine whether your draw is paid in full, partially, or held.
- Lien waivers you sign are tied to the amount actually disbursed, not what you requested.
- Preparation before the inspector arrives is the single biggest factor in getting paid on time.
Table of Contents
- What does a lender draw inspection actually verify?
- Who performs draw inspections and when do they happen?
- What does an inspector’s checklist actually look like?
- How should you prepare before the inspector arrives?
- What happens after the inspection, and how does it affect your payment?
- How long do inspections take and who pays the fee?
- Common misconceptions about draw inspections, and how to avoid funding delays
- Sample lender draw inspection checklist for contractors
- Key Takeaways
- What experienced project managers actually do differently
- Speed up your lien waiver paperwork on inspection day
- Useful sources and further reading
What does a lender draw inspection actually verify?
The inspector’s job is verification, not judgment. They are not checking code compliance, workmanship quality, or whether your crew is using the right fasteners. Their focus is narrower and more specific: does the physical work on site match the percentage of completion you claimed for each line item in your pay application?
For each budget line, the inspector assigns a percent-complete figure. The lender then calculates your net draw using a straightforward formula: approved percentage of the line-item budget, minus prior draws already released, minus any retainage held back per the loan terms. Change orders factor in separately. That math is what produces your actual check.
Lenders require independent third-party inspections as a loan risk control. Without them, lenders would be funding based on contractor invoices alone, which creates real fraud and collateral exposure. The inspection is the mechanism that keeps disbursements tied to verified progress.
Pro Tip: Treat every line item on your G702/G703 as a claim you need to prove, not just report. The inspector’s percent-complete figure for each line is the number that drives your payment.
Who performs draw inspections and when do they happen?

Inspectors work for the lender, not for you or the borrower. They are typically independent third-party firms or qualified individual inspectors hired by the lender to provide an unbiased report. Some lenders use their own staff reviewers, but third-party independence is the standard on most commercial and residential construction loans.
The timing follows a predictable pattern:
- You submit your draw request package (pay application, photos, supporting documents).
- The lender reviews the package and schedules the inspection.
- The inspector visits the site and files a report.
- The lender issues a disbursement decision based on the report.
Common inspection milestones include foundation completion, framing, MEP rough-in, drywall, exterior shell, and final completion. On larger projects, inspections may occur monthly regardless of milestone. Lenders combine scheduled site visits with geolocated photo monitoring on some projects, so assume both physical and photographic evidence may be reviewed.
What does an inspector’s checklist actually look like?
Inspectors follow a structured review during every site visit. Here is what they are typically documenting:
- Percent complete by budget line item: The core of the report. Each line gets a number.
- Installed vs. staged materials: Materials sitting in a trailer or on pallets do not count as installed work. Only what is physically in place qualifies.
- Concealed work documentation: Underground plumbing, electrical rough-in, and insulation behind drywall must be supported by dated, labeled photos taken before concealment. Without that evidence, inspectors may discount or reject those line items entirely.
- Plan and draw-request comparison: The inspector compares observed conditions to the approved plans and what you claimed in your draw request. Discrepancies get flagged.
- Site safety and access: Blocked access, unsafe conditions, or a disorganized site can affect the report’s overall tone.
- Permit status: Active permits should be posted and current.
Pro Tip: Label your concealed-work photos with the budget line item number, the date, and a brief description before you close up the wall or pour the slab. A photo labeled “Line 14 — Electrical Rough-In — 3rd Floor East Wing — [date]” is far more useful to an inspector than an unlabeled image of wiring.
How should you prepare before the inspector arrives?
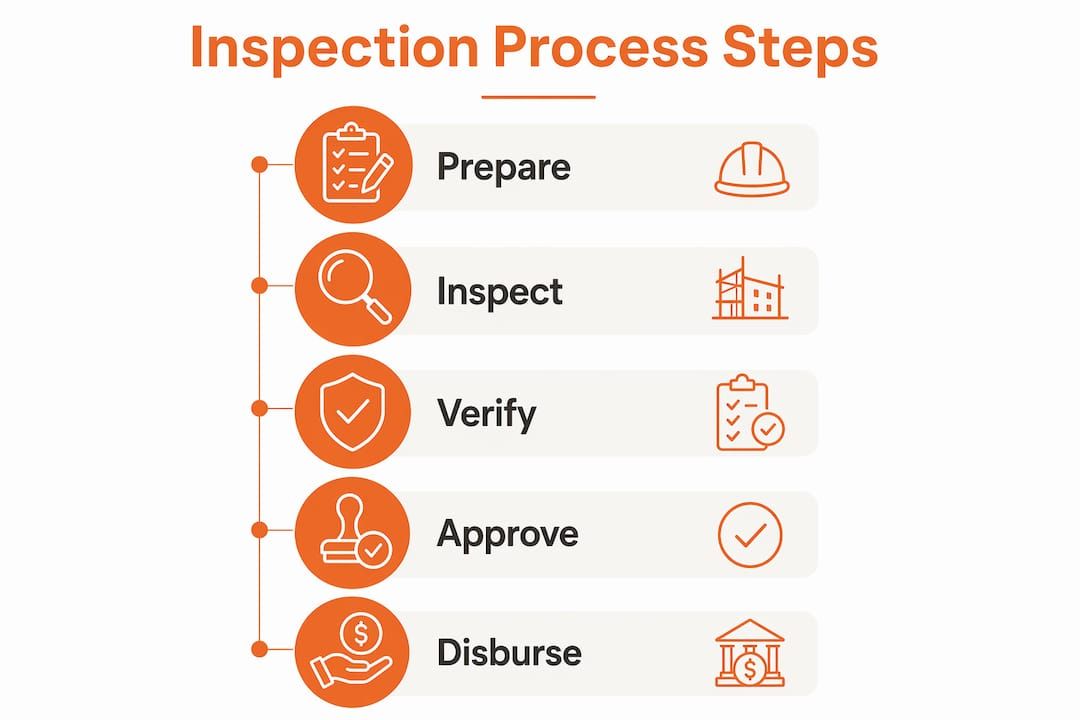
Preparation is where draws are won or lost. A well-organized package and a clean site tell the inspector the project is under control before they check a single line item.
Documentation to assemble:
- Signed pay application (AIA G702/G703 or equivalent) with all line items filled in accurately.
- Dated photos for every line item you are claiming, especially concealed work.
- Delivery receipts for materials installed since the last draw.
- Approved change-order documentation for any scope additions.
- A draft lien waiver matching the draw amount, ready to sign upon disbursement.
Site readiness:
- Clear, safe walking paths through all areas the inspector needs to see.
- Materials organized and labeled so the inspector can quickly match them to line items.
- Reference tags or printed labels tied to budget line numbers visible near the corresponding work.
Communication: If your schedule has slipped or a line item is less complete than you originally projected, tell the lender or GC before the inspector shows up. A simple message like, “Framing on the east wing is at 85% rather than the 95% we projected — MEP coordination caused a three-day delay,” resets expectations before the inspector documents a discrepancy. Proactive communication before the inspection is far less painful than explaining a reduced draw after the fact.
A builder loan calculator can help you model how partial payouts at different completion percentages affect your cash flow between draws, so you can plan ahead rather than react.
What happens after the inspection, and how does it affect your payment?
The inspector submits a written report to the lender. That report includes photos, percent-complete figures for each budget line, and a recommended disbursement amount. The lender then makes one of four decisions:
- Full approval: The inspection supports your draw request as submitted. Funds are released.
- Partial approval: Some line items came in below your claimed percentage. The lender releases a reduced amount based on the inspector’s figures.
- Request for clarification: The inspector flagged a discrepancy and the lender needs more documentation before deciding.
- Rejected draw: The work on site does not support the request. No funds are released until the issue is resolved.
The disbursement amount directly determines which lien waivers you sign. If you requested $80,000 but the inspector supports only $65,000, you sign a conditional progress waiver for $65,000, not $80,000. Signing a waiver for the wrong amount creates a lien-rights problem, so always match your waiver to the actual disbursement.
How long do inspections take and who pays the fee?
The on-site visit for a typical residential inspection runs roughly one to two hours. Commercial projects with more line items take longer. Standard inspection reports return in approximately two business days; some lenders offer expedited turnaround for an additional fee.
Inspection fees for commercial projects vary by provider and project size. Who pays depends on your loan terms. In many cases, fees are billed to the borrower or escrowed within the loan’s inspection reserve at closing. Read your loan agreement to know whether the inspection cost comes out of your draw or is handled separately.
Key figure: A two-business-day report turnaround is the standard window for residential inspections. Plan your draw submission timing so that window does not push your payment past a critical payroll or supplier deadline.
Common misconceptions about draw inspections, and how to avoid funding delays
Myth: Submitting invoices is enough. Invoices prove you ordered materials or paid a subcontractor. They do not prove the work is physically in place. Inspectors verify conditions on the ground, and photos alone can be insufficient without an in-person visit to confirm.
Myth: The inspector is checking code compliance. They are not. A draw inspection is not a building department inspection. The focus is progress percentage and draw-request accuracy, not whether your work meets code.
Myth: A clean site does not matter. A disorganized job site signals risk to an inspector. When line-item evidence is borderline, a well-organized site can tip the percent-complete judgment in your favor.
Best practices:
- Standardize your photo file names: project name, line item number, date, and description.
- Include plan sheet references on photos when possible (a sticky note with the grid reference works).
- Supply a concise evidence package, one folder per draw, organized by line item.
- Never claim a line item at 100% if any portion remains. Inspectors notice, and it damages credibility on every other line.
Sample lender draw inspection checklist for contractors
Use this checklist before every inspection day. Adapt it to your pay-app format and loan requirements.
Pre-inspection documentation bundle:
- [ ] Signed AIA G702/G703 (or equivalent) with accurate line-item percentages.
- [ ] Dated photos for every claimed line item, labeled with line number and description.
- [ ] Concealed-work photos taken before close-up (plumbing, electrical, insulation).
- [ ] Delivery receipts for materials installed since the last draw.
- [ ] Approved change-order documentation.
- [ ] Draft lien waiver matching the requested draw amount.
Site-readiness items:
- [ ] Safe, clear access to all areas included in the draw.
- [ ] Materials organized and labeled by line item.
- [ ] Active permits posted and visible.
- [ ] Reference tags near work areas tied to budget line numbers.
Concealed-work photo guidance:
- [ ] Photo taken before concealment, in adequate light.
- [ ] Label visible in frame or added digitally: line item, date, location.
- [ ] At least one wide-angle and one close-up per concealed scope.
Download a printable version of this checklist and a short email template for sending your documentation package to the lender at Waiverpilotpro’s free construction forms library.
Key Takeaways
A lender draw inspection is an independent site verification that ties every dollar disbursed to physically confirmed progress, making preparation and documentation the contractor’s most direct lever over payment timing.
| Point | Details |
|---|---|
| Inspection = verification, not QA | Inspectors confirm percent complete per line item, not code compliance or workmanship quality. |
| Concealed work needs photo proof | Dated, labeled photos of underground and in-wall work are often the deciding factor for those line items. |
| Site organization signals competence | A clean, organized site can influence borderline percent-complete judgments in your favor. |
| Communicate delays before the visit | Telling the lender about schedule changes before the inspector arrives prevents unexpected draw reductions. |
| Waiverpilotpro matches waivers to disbursements | Generate state-specific conditional or final waivers that match your actual draw amount, not your requested amount. |
What experienced project managers actually do differently
Most contractors treat the draw inspection as something that happens to them. The ones who get paid consistently treat it as something they control.
The conventional wisdom says to “be organized” and “take photos.” That is true but incomplete. The real discipline is building a single-folder evidence package for every draw, assembled 48 hours before the inspection, organized by line item number in the same order as your G702/G703. When the inspector arrives, you hand them a printed index of that folder. They can match your photos and receipts to your line items in minutes instead of asking questions you have to answer on the spot.
The other thing most contractors underestimate is the power of a brief pre-inspection call with the lender’s draw coordinator. Two minutes explaining any deviations from the original schedule, before the inspector documents them as discrepancies, is worth more than any amount of after-the-fact explanation. Inspectors report what they see. Lenders interpret what they read. If the lender already knows framing is at 85% instead of 95% because of a weather delay, the inspector’s 85% figure confirms your honesty rather than raising a red flag.
Transparency is not a soft skill in this context. It is a cash-flow strategy.
Speed up your lien waiver paperwork on inspection day
Draw inspections move fast, and the paperwork that follows them, specifically the lien waivers tied to each disbursement, can slow you down if you are building them from scratch every time.

Waiverpilotpro gives contractors a faster path from disbursement decision to signed waiver. Generate state-specific conditional or unconditional waivers in minutes, with auto-calculated payment fields that match your actual draw amount. No templates to hunt down, no manual math. If you use Procore, QuickBooks, Jobtread, or Buildertrend, Waiverpilotpro connects directly to those platforms so your project data carries over automatically.
The free tier covers unlimited basic waiver generation. The Pro tier adds AI-powered auto-fill from uploaded contracts, project saving, and multi-subcontractor management, which is useful when you are coordinating waivers across several subs after a single draw approval. Start generating your draw-day waivers at waiverpilotpro.io/free-lien-waiver-generator.
Useful sources and further reading
The following sources informed this guide and offer deeper detail on lender inspection processes, contractor preparation, and construction loan workflows:
- LegalClarity: Construction Draw Inspections — Process and Requirements — Covers inspector duties, percent-complete methodology, and disbursement calculations.
- DrawCheck: Construction Draw Process Explained — Explains inspector independence, fee ranges, and lender decision-making.
- Built: Draw Inspections and Lender Turnaround — Details how lenders use inspection networks and remote monitoring to speed verification.
- Sekady: What Is a Draw Inspection? — Practical overview of what inspectors document and how discrepancies affect payouts.
- Projul: Construction Loan Draw Guide — Covers site organization, concealed-work documentation, and contractor preparation.
- Trinity Real Estate Solutions: Construction Draw Inspections — Addresses photo evidence limitations and the importance of in-person verification.
- Waiverpilotpro: AIA G702/G703 Pay App Guide — Explains how pay applications tie to draw inspections and disbursement calculations.
This article is general information for contractors and construction project managers. It is not legal or financial advice. Confirm your lender’s specific inspection requirements and loan terms with your lender or a qualified professional before submitting a draw request.