
Remodeling Contract for Homeowners: Checklist & Template
A solid remodeling contract spells out scope of work, exact pricing, payment milestones, permits, insurance, change-order rules, dispute resolution, and lien-waiver procedures. Without every one of those elements in writing, you are exposed to cost overruns, unfinished work, and liens filed against your home by subcontractors you never even hired directly. BBB and state attorney general guidance consistently treat the written contract as the project’s primary reference point, not a formality.
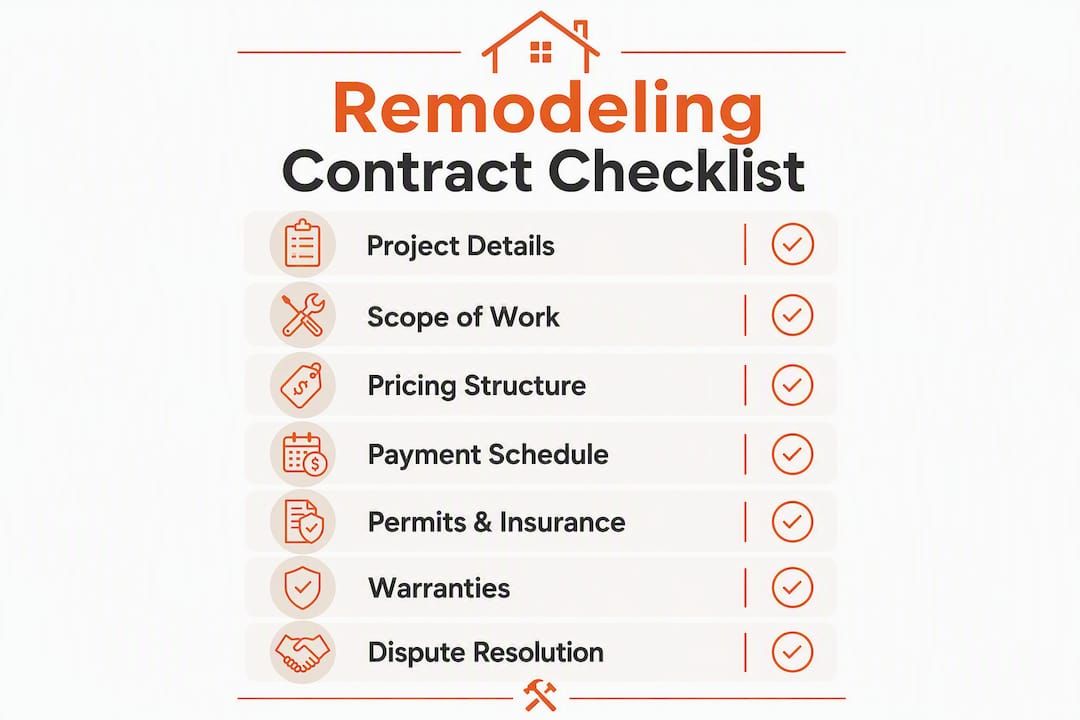
Before you sign anything, run through this checklist:
- Scope of work with materials, brands, measurements, and explicit exclusions
- Fixed price or pricing type clearly stated
- Payment schedule tied to milestones, not calendar dates
- Project timeline with defined milestones and a completion date
- Change-order process requiring written, signed approval before work starts
- Permit responsibility assigned to the contractor in writing
- Insurance certificates for general liability and worker’s compensation
- Warranty terms for both workmanship and materials
- Dispute resolution clause naming the method (arbitration or court)
- Lien-waiver requirement at each progress payment and at final disbursement
Pro Tip: Don’t pay more than your state’s permitted deposit upfront. California, for example, caps the initial deposit at the lesser of $1,000 or 10% of the total contract price under Business and Professions Code §7159. Check your own state’s limit before writing the first check.
Table of Contents
- What every remodeling contract clause should actually say
- How to structure payments, retainage, and change orders without losing leverage
- How to set a realistic timeline and protect yourself from delays
- Who is responsible for permits, and how to document it
- Insurance, warranties, and liability protections you should require
- How to verify a contractor before you sign anything
- Confusing contract clauses and what they actually mean
- Lien waivers: the one protection most homeowners skip
- A simple remodeling contract template you can use today
- Key Takeaways
- The contract mistakes that cost homeowners the most
- Waiverpilotpro makes lien waiver collection straightforward
- Useful sources and further reading
What every remodeling contract clause should actually say
A home renovation agreement is only as strong as its specific language. Vague wording like “work as shown” or “standard materials” is where disputes start. Here is what each clause should contain.
Scope of work
The scope section should name every material by brand, model, or specification, list the exact measurements of the work area, and state explicitly what is not included. If the contractor is tiling the kitchen but not the adjacent hallway, that exclusion belongs in the contract. Attach a separate exhibit for drawings or material cut sheets and reference it in the body of the agreement.
Pricing structure
Three pricing models appear in residential remodeling contracts:
| Pricing Type | How it works | Best fit |
|---|---|---|
| Fixed-price (lump sum) | One total price for defined scope | Well-defined projects with complete plans |
| Cost-plus | Actual costs plus a contractor fee (% or fixed) | Projects with incomplete design or unknowns |
| Guaranteed Maximum Price (GMP) | Cost-plus with a cost ceiling | Larger renovations where scope may shift |
For most homeowners doing a kitchen or bathroom remodel with complete plans, a fixed-price contract gives the clearest budget protection. Cost-plus arrangements can work when the scope is genuinely uncertain, but they require open-book accounting and a clear definition of what counts as a reimbursable cost.
Payment schedule
Tie every draw to a verifiable milestone, not a date. A payment schedule that reads “25% due March 1” gives you no leverage if the work is behind. One that reads “25% due upon framing inspection passed” keeps the contractor accountable.

Statutory deposit caps vary by state. California’s $1,000 or 10% rule is the most cited, but many other states have their own limits. Check your state’s home improvement statute before agreeing to any deposit amount.
Milestones and acceptance criteria
Define what “complete” means for each phase. Acceptable criteria include a passed inspection, a certified inspector’s sign-off, or a defined percentage of work verified by a third party. Avoid language that lets the contractor self-certify completion.
Change-order process
Every change to scope, materials, or timeline must be documented in a signed written change order before work begins. The change order should state the cost impact, the schedule impact, and the revised total contract price. Oral approvals and text messages are frequently unenforceable when disputes reach arbitration or court.
Permits and inspections
The contract should assign permit responsibility to the contractor by default. If you choose to pull permits yourself, that decision must be made in writing with a clear understanding that it shifts liability to you. Require the contractor to provide copies of all issued permits and inspection sign-offs before releasing the related payment draw.
Insurance and liability
Require proof of:
- General liability insurance (minimum $1 million per occurrence is a common baseline)
- Worker’s compensation coverage for all employees on site
- Property damage coverage
Ask for certificates of insurance naming you as an additional insured. Include a clause requiring the contractor to notify you if any policy is cancelled or lapses during the project.
Warranties and remedies
Separate workmanship warranties from manufacturer material warranties. A workmanship warranty of one year is a common minimum; structural work often warrants longer periods. Define the remedy process: who the homeowner contacts, how quickly the contractor must respond, and what happens if the contractor fails to respond.
Dispute resolution and termination
Name the method for resolving disputes. Arbitration is faster and less expensive than litigation for most residential disputes, but make sure any arbitration clause includes a small-claims carve-out for minor amounts. Include a cure period (typically 10–14 days) before either party can terminate, and define what happens to materials and deposits if the contract ends early.
Recordkeeping and communication
Specify who maintains daily progress logs, how requests for information (RFIs) are submitted, and the frequency of written status updates. A weekly written summary from the contractor is a reasonable minimum. These records become critical evidence if a dispute arises.
Pro Tip: Attach a material specifications exhibit to the contract before signing. If the contractor substitutes a different tile brand or fixture model without written approval, the exhibit gives you a documented baseline to enforce.
How to structure payments, retainage, and change orders without losing leverage
Payment terms are where most homeowners give up control without realizing it. A few structural choices at the contract stage protect you throughout the project.
Payment structures for typical remodels
A lump-sum contract with milestone-based draws is the most homeowner-friendly structure for projects with complete plans. A typical draw schedule for a kitchen remodel might look like this:
| Draw | Trigger event | Suggested % of contract |
|---|---|---|
| Deposit | Contract signed, permits applied for | 10% (or state cap) |
| Draw 1 | Demolition complete, rough-in started | 25% |
| Draw 2 | Framing and rough-in inspection passed | 25% |
| Draw 3 | Drywall and finishes complete | 25% |
| Final | Punch list resolved, final inspection passed, lien waivers received | 15% |
Cost-plus arrangements make sense when the scope genuinely cannot be fixed upfront, such as a whole-house renovation where structural conditions are unknown. In those cases, require the contractor to provide weekly cost reports and receipts before each draw.
Retainage and final payment
Retainage is a percentage of each draw that you hold back until the project is substantially complete. A 10% retainage on each draw is a common practice. Release retainage only after the punch list is resolved, the final inspection is passed, and you have received unconditional final lien waivers from the general contractor and all listed subcontractors.
Tying draws to verifiable inspection milestones rather than calendar dates is the single most effective way to preserve your leverage throughout a project.
Sample progress payment clause
Adapt the trigger event and dollar amount to your project. The key elements are the verifiable event, the waiver requirement, and the timeline for payment.
Change-order rules
Change orders are the most common source of disputes in residential remodeling. Protect yourself with these rules in the contract:
- All changes must be in writing and signed by both parties before work begins.
- Each change order must state the cost impact (added or deducted), the schedule impact in calendar days, and the revised contract total.
- No verbal or text-message approvals are valid.
- Include a contingency cap: either a fixed dollar amount or a percentage of the contract price (5–10% is typical) that covers minor field adjustments without a full change-order process.
Pro Tip: Require the contractor to attach a cost breakdown to every change order before you sign it. A line item showing labor hours, material costs, and markup is far easier to evaluate than a single lump-sum number.
How to set a realistic timeline and protect yourself from delays
A project timeline without defined milestones is just a guess. A well-drafted home improvement contract turns that guess into an enforceable schedule.
Defining milestones and acceptance criteria
Each milestone should name a specific, verifiable event: demolition complete, framing inspection passed, rough-in approved, tile set and grouted. Avoid milestones like “approximately 50% complete” unless a certified inspector defines what that means. Tie each milestone to the payment draw it unlocks.
Delay clauses
Distinguish between excusable and non-excusable delays in the contract:
- Excusable delays (no penalty): acts of God, government-ordered shutdowns, material supply disruptions beyond the contractor’s control, or permit delays caused by the building department.
- Non-excusable delays (contractor liable): labor shortages the contractor should have anticipated, poor scheduling, or failure to order materials on time.
For non-excusable delays, consider a liquidated damages clause that specifies a daily dollar amount the contractor owes for each day past the completion date. Keep the amount reasonable and tied to your actual costs (temporary housing, storage, etc.) to make it enforceable.
Weather, supply-chain, and permit delays
Require the contractor to notify you in writing within 48 hours of any event that may delay the schedule, along with a documented mitigation plan. A contractor who goes silent about a delay is a red flag. The notice requirement gives you a paper trail and keeps the contractor accountable for managing around disruptions.
Completion and punch-list process
Define “substantial completion” in the contract: the point at which the work is usable for its intended purpose even if minor items remain. After substantial completion, the contractor should provide a written punch list of remaining items. Give the contractor a reasonable period (14–21 days is typical) to resolve punch-list items, and withhold final payment until all items are signed off and lien waivers are received.
Who is responsible for permits, and how to document it
Permits protect you, not just the contractor. A project completed without required permits can create problems when you sell the home, file an insurance claim, or need warranty service.
Assigning permit responsibility
The contract should state clearly that the contractor is responsible for obtaining all required permits and paying associated fees, unless you expressly agree otherwise in writing. A clause like this works:
- “Contractor shall obtain all permits required by applicable federal, state, and local laws for the work described herein. Copies of all issued permits shall be provided to Owner prior to commencement of the permitted work. Contractor shall schedule and attend all required inspections and provide Owner with copies of all inspection sign-offs.”
Require permit evidence before releasing draws
Make permit copies and inspection sign-offs a condition of each related payment draw. If the contractor cannot produce a passed framing inspection, the framing draw does not get released. This is a simple rule that prevents a contractor from billing ahead of actual progress.
State-specific rules vary significantly
Contracting regulations and required disclosures are highly fragmented by state. Massachusetts, for example, requires specific contract content under its Home Improvement Contractor program for projects above a statutory threshold, including payment schedule rules and permit-responsibility disclosures. Your state may have similar requirements. Check your state’s home improvement contractor statute before finalizing any contract.
Pro Tip: Ask the contractor upfront whether the project may trigger code-upgrade requirements. In many jurisdictions, a Level 2 or Level 3 alteration requires ADA path-of-travel improvements or electrical panel upgrades. Knowing this before work starts prevents surprise change orders mid-project.
Insurance, warranties, and liability protections you should require
Skipping the insurance verification step is one of the most common and costly mistakes homeowners make. If an uninsured worker is injured on your property, you may be liable.
Minimum insurance requirements
Require the following before work starts:
- General liability insurance: covers property damage and bodily injury caused by the contractor’s work. A $1 million per-occurrence limit is a reasonable minimum for most residential projects.
- Worker’s compensation: covers injuries to the contractor’s employees. If the contractor has no employees, require a signed written statement to that effect.
- Property damage coverage: protects your home and belongings during construction.
Ask for certificates of insurance naming you as an additional insured on the general liability policy. Include a clause requiring 30 days’ written notice to you before any policy is cancelled.
Warranty terms
Define two separate warranty categories in the contract:
- Workmanship warranty: covers defects in the contractor’s installation or labor. One year is a common minimum; structural work often carries longer periods under state law.
- Material manufacturer warranties: pass through to you from the manufacturer. Require the contractor to provide all warranty documentation at project closeout.
Require that warranties be transferable to a future buyer of the home. This matters when you sell.
Hold harmless and indemnity clauses
Broad indemnity clauses that require you to indemnify the contractor for the contractor’s own negligence are worth pushing back on. A fair indemnity clause runs in one direction: the contractor indemnifies you for losses caused by the contractor’s negligence or willful misconduct. If the contract asks you to hold the contractor harmless for anything beyond your own actions, negotiate that language out.
Pro Tip: Call the contractor’s insurance carrier directly to verify coverage dates and limits. A certificate of insurance is easy to forge; a phone call to the carrier takes two minutes and confirms the policy is active.
How to verify a contractor before you sign anything
A well-written contract cannot protect you from a contractor who is unlicensed, uninsured, or has a history of disputes. Verification happens before the contract is signed.
Licensing and registration
- Ask the contractor for their state license number and the name under which they are licensed.
- Verify the license on your state contractor board’s website. Most states have a public lookup tool. The National Association of State Contractors Licensing Agencies (NASCLA) maintains a directory of state licensing boards.
- Confirm the license is active, covers the type of work being done, and has no disciplinary actions on record.
- For specialty work (electrical, plumbing, HVAC), verify that the relevant subcontractors also hold the required trade licenses.
Reference checks
Ask for three references from projects completed in the past two years. When you call:
- Did the project finish on schedule? If not, how were delays handled?
- Were change orders documented in writing before work started?
- How was the punch list handled at the end?
- Would you hire this contractor again?
A contractor who resists providing references is a red flag.
Proof-of-insurance checklist
Before work starts, collect:
- Certificate of insurance showing general liability and worker’s comp
- Policy numbers and effective dates
- Carrier name and contact number
- Confirmation that you are listed as additional insured
Red flags to watch for
- Requests for a large cash deposit (more than your state’s statutory cap)
- Vague scope language with no material specifications
- Resistance to providing lien waivers
- Refusal to provide written references or license documentation
- Pressure to start work before a written contract is signed
Pro Tip: Attach your verification checklist to the contract as Exhibit A and make the contractor’s signature on it a condition of the agreement. This creates a record that you completed due diligence and that the contractor confirmed their credentials in writing.
Confusing contract clauses and what they actually mean
Some contract language is written to protect the contractor, not you. Here is how to read the most common problem clauses.
Acceleration clauses
An acceleration clause lets the contractor demand full payment immediately if you miss a payment deadline, even if the work is incomplete. Push back on any clause that accelerates the full contract balance without a cure period. A reasonable version gives you 10 business days to cure a missed payment before any acceleration right kicks in.
Vague scope language
“Work as shown,” “per plans,” or “standard quality” are phrases that invite disputes. Every reference to plans or specifications should name the specific document (e.g., “Architectural drawings dated March 3, 2026, attached as Exhibit B”). If no drawings exist, require the contractor to create a written scope exhibit before signing.
Broad indemnity clauses
Watch for language that requires you to indemnify the contractor for “any and all claims arising from the project.” Limit indemnity to claims arising from your own negligence or actions, not the contractor’s. A one-sided indemnity clause can expose you to costs from the contractor’s mistakes.
Liquidated damages vs. penalty language
Liquidated damages clauses set a pre-agreed daily amount for delays. They are enforceable when the amount is a reasonable estimate of your actual damages. Penalty clauses that set punitive amounts unrelated to actual harm are often unenforceable. If you include a liquidated damages clause, tie the daily amount to a real cost you would incur (hotel, storage, rental housing).
Arbitration clauses
Arbitration is generally faster and less expensive than litigation for residential disputes. It is reasonable to accept an arbitration clause, but negotiate for:
- A small-claims carve-out for disputes below a threshold (typically $10,000–$15,000)
- A neutral arbitration provider (the American Arbitration Association is widely used)
- A clause that splits arbitration costs equally rather than requiring you to pay all fees
Pro Tip: If a contract clause reads like it was written entirely for the contractor’s benefit, ask for a redline. A reputable contractor will negotiate reasonable language. One who refuses to discuss contract terms is telling you something important.
Lien waivers: the one protection most homeowners skip
Paying your general contractor in full does not protect your home from liens. Unpaid subcontractors and suppliers can still file a mechanic’s lien against your property even after you have paid the GC every dollar owed. A mechanic’s lien attaches to the property itself and can complicate a sale or refinance until it is resolved.
What a mechanic’s lien is
A mechanic’s lien is a legal claim filed against your property by anyone who provided labor or materials and was not paid. The lien does not require a court judgment to attach. State consumer handbooks describe the process clearly: a subcontractor who framed your addition, a supplier who delivered the lumber, or a tile installer you never met can all file liens if the GC did not pay them.
The four lien-waiver types
Lien waivers come in four forms, each with a different risk profile:
| Waiver type | When to use it | What it does |
|---|---|---|
| Conditional progress | With each progress payment | Waives lien rights if payment clears |
| Unconditional progress | After payment has cleared | Permanently waives lien rights for work to date |
| Conditional final | With final payment | Waives all remaining lien rights if final payment clears |
| Unconditional final | After final payment clears | Permanently waives all lien rights on the project |
Accept a conditional waiver when you are releasing a draw. Once payment clears, follow up for the unconditional version. Never release final payment without an unconditional final waiver from the GC and every listed subcontractor.
Practical workflow
- Require conditional progress waivers from the GC and all listed subs with each draw request.
- After each payment clears, collect unconditional progress waivers before the next draw is released.
- At project closeout, hold final payment until you have unconditional final waivers from the GC and all subcontractors and suppliers.
- Keep all waivers with your contract file and payment records.
Notice timelines and homeowner options vary by state. In some states, you have the right to pay subcontractors directly if the GC fails to do so; in others, you may withhold funds pending proof of payment. Know your state’s rules before the project starts.
Sample lien-waiver clause for your contract
How Waiverpilotpro makes this easier
Waiverpilotpro’s free lien waiver generator lets contractors produce conditional and unconditional waivers in minutes, with auto-calculated payment fields and notarizable PDF output. As a homeowner, you can request that your GC use the tool to generate and deliver properly formatted waivers at each draw. The platform supports all four waiver types and integrates with construction management software like Procore and Buildertrend, so waiver records stay organized alongside project files.
Pro Tip: Tie each draw release to receipt of signed waivers from the GC and a written certification that all listed subcontractors’ waivers are attached. If a sub’s waiver is missing, hold that portion of the draw until it arrives. A plain-English guide to lien waivers can help you understand exactly what you are collecting and why.
A simple remodeling contract template you can use today
The template below covers the core elements of a home renovation agreement in plain English. Adapt it to your project, attach the required exhibits, and have an attorney review it for projects above $25,000 or involving structural work.

RESIDENTIAL REMODELING CONTRACT
Parties: Owner: [Full name, address] Contractor: [Full name, license number, address, state license board]
Project address: [Address]
Scope of work: As described in Exhibit A (Scope of Work and Material Specifications), attached and incorporated herein. Any work not listed in Exhibit A is excluded from this contract.
Contract price: $[Total amount] (fixed-price / cost-plus with GMP of $[amount])
Payment schedule:
| Draw | Trigger | Amount |
|---|---|---|
| Deposit | Contract signed | $[X] |
| Draw 1 | [Milestone 1] | $[X] |
| Draw 2 | [Milestone 2] | $[X] |
| Final | Punch list resolved, final inspection passed, all lien waivers received | $[X] |
Timeline: Work begins [date]. Substantial completion by [date]. Time is of the essence.
Change orders: No change to scope, price, or timeline is valid unless documented in a written change order signed by both parties before work begins.
Permits: Contractor shall obtain all required permits and provide copies to Owner before commencing permitted work.
Insurance: Contractor shall maintain general liability ($[amount] minimum) and worker’s compensation insurance throughout the project and provide certificates of insurance naming Owner as additional insured.
Warranties: Contractor warrants workmanship for [one year / other period] from substantial completion. Material warranties pass through to Owner per manufacturer terms.
Lien waivers:
Dispute resolution: Disputes shall be resolved by binding arbitration under AAA Construction Industry Rules, except that either party may bring claims below $[10,000] in small claims court.
Signatures: Owner signature / date. Contractor signature / date.
How to fill it out: step-by-step
- Exhibit A (Scope): List every item of work with material specifications, brands, model numbers, and measurements. State what is excluded.
- Exhibit B (Draw schedule): Name the specific inspection or milestone that triggers each draw.
- Exhibit C (Insurance certificates): Attach before work starts.
- Exhibit D (Permit copies): Add as permits are issued.
- Exhibit E (Lien waivers): Collect and attach at each draw and at final payment.
Download a PDF or Word version of this template from Waiverpilotpro’s free construction forms library and keep your waiver records in the same file.
Pro Tip: If your state imposes a deposit cap (like California’s $1,000 or 10% rule), write the cap amount directly into the payment schedule exhibit so there is no ambiguity at signing.
Key Takeaways
A remodeling contract protects you only when it ties every payment to a verifiable milestone, assigns permit responsibility to the contractor, and requires lien waivers from all subs before each draw is released.
| Point | Details |
|---|---|
| Tie payments to milestones | Release each draw only after a passed inspection or defined work event, never on a calendar date. |
| Cap your deposit | Check your state’s statutory limit; California caps deposits at $1,000 or 10% of the contract price. |
| Require lien waivers every draw | Collect conditional progress waivers with each payment and unconditional final waivers before releasing the last check. |
| Verify licensing before signing | Confirm the contractor’s license is active and covers the work type through your state board or NASCLA. |
| Waiverpilotpro simplifies waivers | Request that your GC use Waiverpilotpro’s free generator to produce properly formatted, notarizable waivers at each draw. |
The contract mistakes that cost homeowners the most
Most remodeling disputes do not start with a bad contractor. They start with a contract that left too much unsaid.
The most common error is signing a contract that references “plans” or “specifications” that do not yet exist. Homeowners assume the contractor knows what they want; contractors assume the homeowner approved whatever they planned to do. The gap between those assumptions is where change orders multiply and budgets collapse. The fix is simple: no signature until Exhibit A is complete and both parties have reviewed it line by line.
The second mistake is paying too much too soon. A contractor who has received 80% of the contract price before 50% of the work is done has little financial incentive to finish on schedule. Milestone-based draws keep the contractor’s financial interest aligned with yours throughout the project.
Lien waivers are the most skipped protection. Homeowners who pay the GC in full and skip waiver collection are genuinely surprised when a subcontractor files a lien months later. The GC may have been paid; the sub may not have been. Collecting conditional waivers at each progress payment and unconditional final waivers at closeout is the only reliable defense.
Three contractor behaviors predict fewer disputes and are worth rewarding when you find them: transparent change-order logs updated in real time, routine lien-waiver delivery with each draw request, and project photo logs tied to milestones. A contractor who does all three is telling you they have managed disputes before and learned from them.
Attorney review is worth the cost when the project exceeds $25,000, involves structural changes, or takes place on a site with unusual conditions (hillside, historic designation, shared walls). One hour of legal review at the contract stage costs far less than one day of arbitration.
Waiverpilotpro makes lien waiver collection straightforward
Collecting lien waivers at every draw is the right move. The friction is usually in the paperwork: tracking down the right form, filling it out correctly, and keeping records organized alongside the rest of the project file.
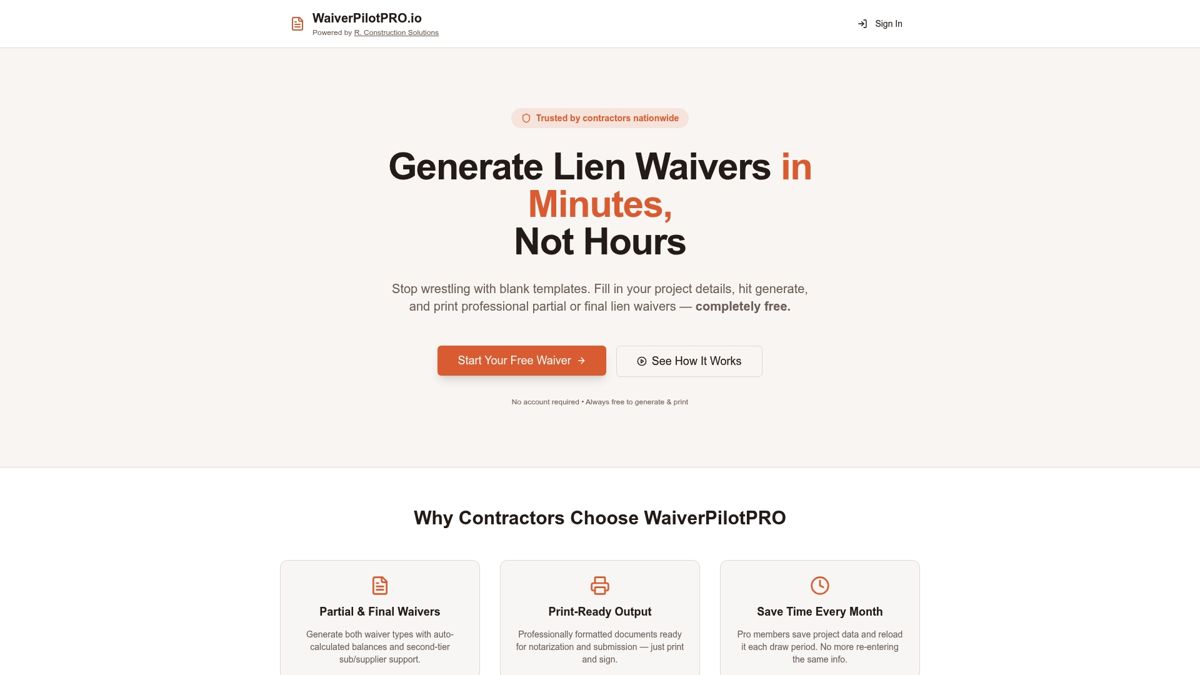
Waiverpilotpro’s free lien waiver generator removes that friction. Contractors fill in project details and generate conditional or unconditional waivers in minutes, with auto-calculated payment balances and professional PDF output ready for signature and notarization. As a homeowner, you can request that your GC use the tool at each draw, so you receive properly formatted, notarizable waivers without chasing down paperwork.
The platform supports all four waiver types, handles multi-subcontractor projects, and integrates with construction management software including Procore, Buildertrend, QuickBooks, and Jobtread. State-specific templates mean the waiver your GC generates matches your jurisdiction’s requirements. Keep those waiver PDFs in the same folder as your signed contract, draw receipts, and inspection sign-offs, and your project closeout file will be complete and title-ready.
Try the free waiver generator at waiverpilotpro.io and download state-specific templates before your next draw is due.
Useful sources and further reading
The sources below back the guidance in this article. Use them to verify state-specific rules, check contractor licensing, and read deeper on lien law.
State law and licensing:
- Massachusetts Home Improvement Contractor (HIC) Program — Massachusetts-specific contract requirements and contractor registration
- NASCLA State Licensing Directory — Find your state’s contractor licensing board and lookup tool
- AGC of America State Law Matrix — State-by-state licensing and disclosure requirements
Consumer protection and contract guidance:
- BBB Home Improvement Contract Guide — Plain-English explanation of what home improvement contracts should include
- Minnesota Attorney General: Home Building and Remodeling — Mechanic’s lien basics and homeowner protections
- Wisconsin Law Help: Home Repair and Construction Liens — Notice timelines and homeowner options for lien situations
Lien waiver resources:
- Conditional vs. Unconditional Lien Waiver: What’s the Difference? — Waiverpilotpro — Definitions, timing, and risk profiles for all four waiver types
- What Is a Lien Waiver? — Waiverpilotpro — Plain-English overview for homeowners and contractors
- Free Construction Forms & Lien Waiver Templates — Waiverpilotpro — Downloadable PDF and Word templates for contracts and waivers